Configuration Policies in Intune are very powerful, but the device restrictions are not dynamic.
What if you want to make configuration changes based on dynamic factors?
In this example I will show how you can disable the camera in a Windows 10 device when it connects to the network of your secret lab.
When the device leaves the network it will revert to the default setting.
- Log on to the Azure Portal and Intune
- Go to Device Configuration
- Go to Profiles
- Create a new profile
Give it a descriptive name and optionally a description.
Choose Platform “Windows 10 and later”
Choose Profile Type “Custom”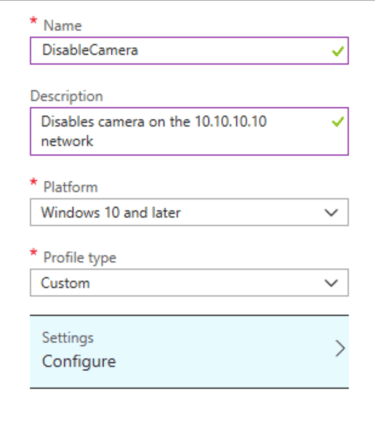
- Add a new OMA-URI setting
This first one is the actual configuration we want to make, in this case to disable the camera.
Enter a name like “NetworkSettingsPack” and optionally a description.
Enter the OMA-URI ./Vendor/MSFT/DynamicManagement/Contexts/NetworkBased/SettingsPack.
Remember the leading dot, it is always included in OMA-URI
Choose DataType “String (XML)” and upload an XML file that contains the following data:Copy to Clipboard - Add another OMA-URI setting
This is the rule for what action that triggers the configuration change.
Enter a name like “NetworkSignalDefinition” and optionally a description.
Enter the OMA-URI ./Vendor/MSFT/DynamicManagement/Contexts/NetworkBased/SignalDefinition
Remember the leading dot, it is always included in OMA-URI
Choose DataType “String (XML)” and upload an XML file that contains the following data (enter the gateway of the network whare you want to restrict camera usage):Copy to Clipboard - Add another OMA-URI setting
The last setting notifies the user about the change.
Enter a name like “EnableNotification” and optionally a description.
Enter the OMA-URI ./Vendor/MSFT/DynamicManagement/NotificationsEnabled.
Remember the leading dot, it is always included in OMA-URI
Choose Data Type “Boolean” and set the value to “True”
- Click “OK” and then “Create”
- Assign the policy.


Leave A Comment